While using Silverstack together with LiveGrade on set to manage clip data and looks hand in hand, you surely want to combine the created information afterwards. Silverstack offers a solution to avoid assigning looks to clips manually. You can connect them based on the metadata you already created while generating them.
How to Match your LiveGrade Pro Looks to Silverstack Clips
It is possible to automatically match a package of looks created with LiveGrade Pro to the according clips in Silverstack. A Look Archive (.pfla) containing several different looks can be exported from LiveGrade Pro. This Look Archive can be imported into Silverstack to then match the looks to the according clips based on different metadata.
The steps to match looks from LiveGrade Pro to clips in Silverstack are:
- Export a Look Archive from LiveGrade Pro
- Import the Look Archive into Silverstack
- Operate the matching Wizard to match by the desired criteria:
- Match by Timecode
- Match by Creation Time of Look
- Match by Episode, Scene, Shot, Take
- Choose if to match with Camera as well
1. Export a Look Archive from LiveGrade Pro
A Look Archive can contain one or multiple looks along with all the further metadata acquired in LiveGrade Pro.
To export a Look Archive put all the desired looks into one folder in the LiveGrade Look Library. Perform a right click on that folder and choose “Export Look Archive” from the context menu:
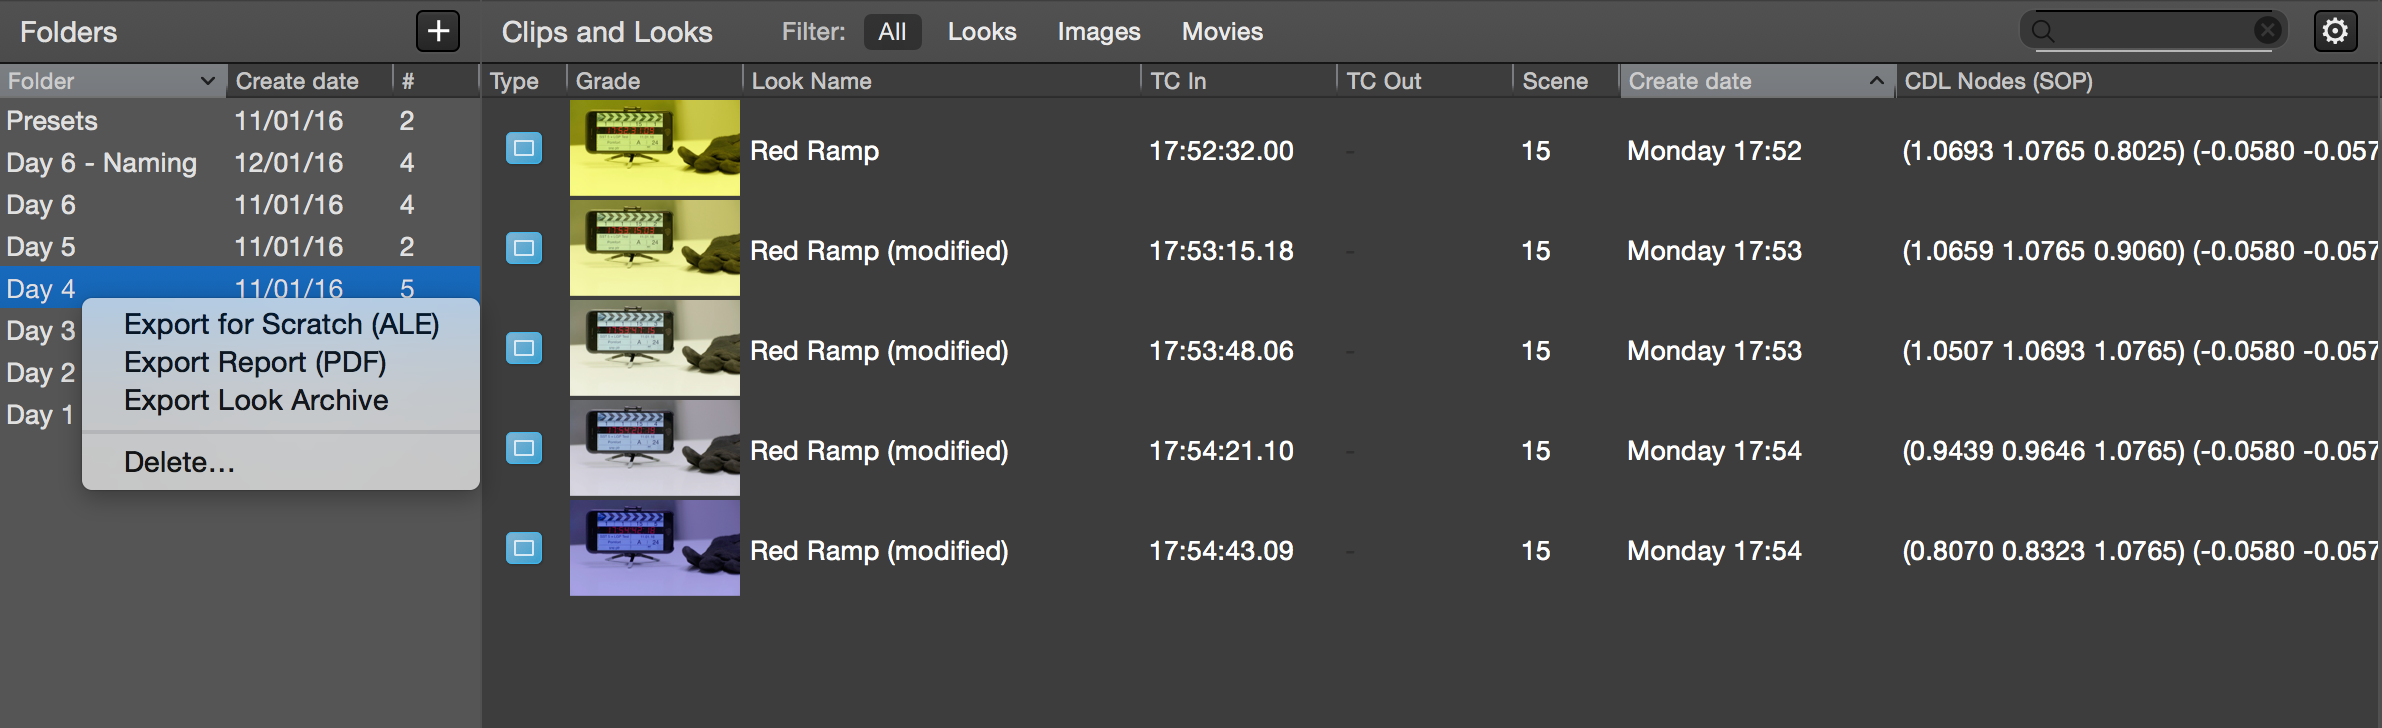
Figure 1: Exporting a Look Archive from LiveGrade Pro
Save the resulting .pfla (Pomfort Look Archive) file to the desired destination.
2. Import a Look Archive into Silverstack
Make sure you ingested all the clips that will get a look into one bin in Silverstack. Learn about offloading media from the article Parallel Offloading.
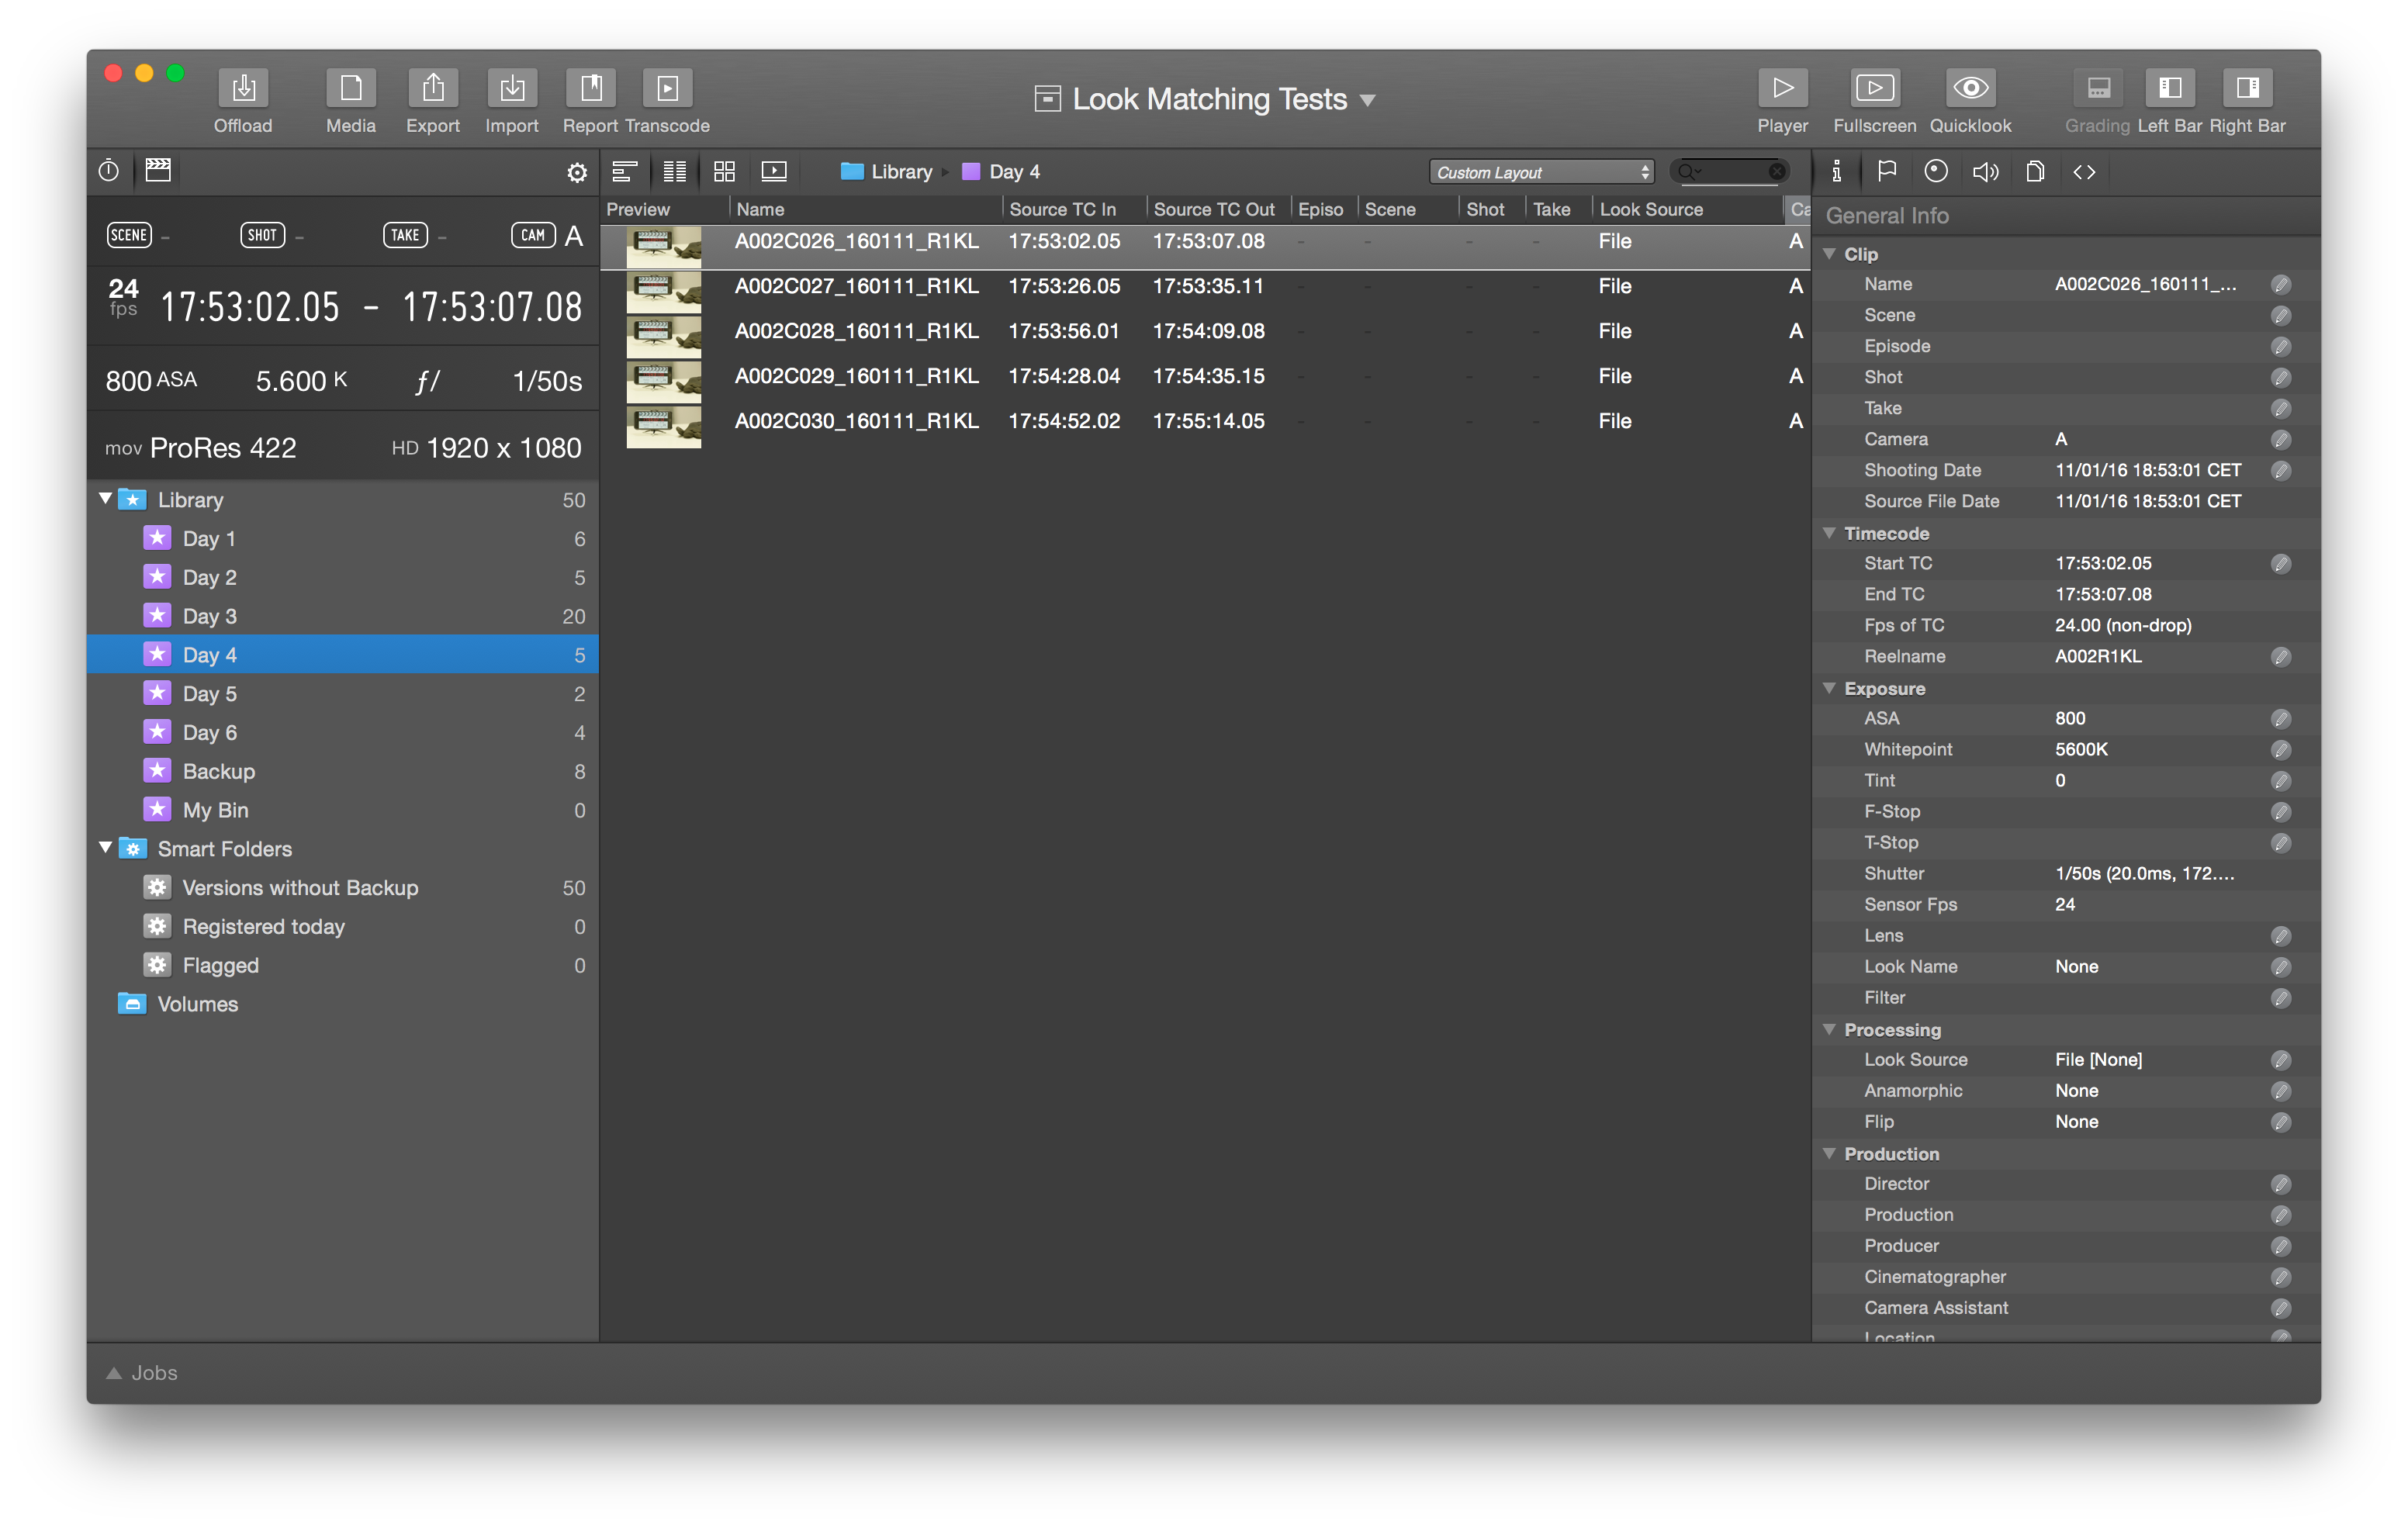
Figure 2: Bin with clips that should receive matching looks
Make sure to have the according bin selected prior to starting the import.
To import a Look Archive into Silverstack go to the Main Menu. Choose “File > Import > Match with Pomfort Look Archive”:
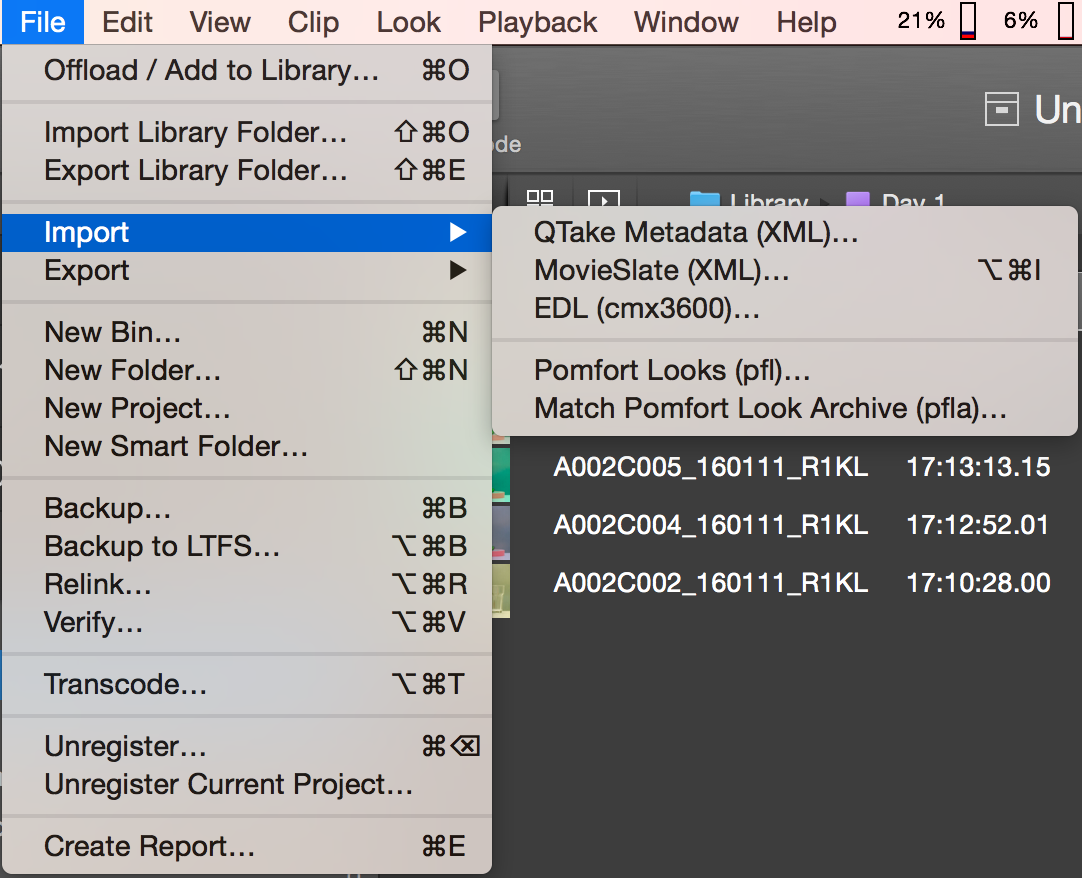
Figure 3: Importing a Look Archive for Matching
3. The Look Matching Wizard
After that a wizard window will open that first advises you to select a Look Archive for the matching:

Figure 4: Select the desired Look Archive
Navigate to the .pfla file you saved from LiveGrade Pro, select it and click “Open”.
You will now be presented with the matching wizard window:

Figure 5: The look matching wizard
You can choose between three different matching criteria:
• Match by Timecode
This criterion will match the looks by timecode. The look will match to a clip if its TC In is before or within the range of the TC of the clip. Additionally the looks will be applied to all clips that follow until the next look with a subsequent TC In. If a new look has a TC In that is inside of the TC range of a clip (so the look before ends within the clip) the matching wizard will suggest two looks but preselects the latter by default.
• Match by Creation Time of Look
This criterion will match the looks by their creation time. The look will match to a clip if its creation date is before the time range of the clip. It will match to all following clips until a new creation date of a look is found that is placed inside the time range of a clip. Additionally you can shift the timezone if the camera setup was wrong at the time of recording:
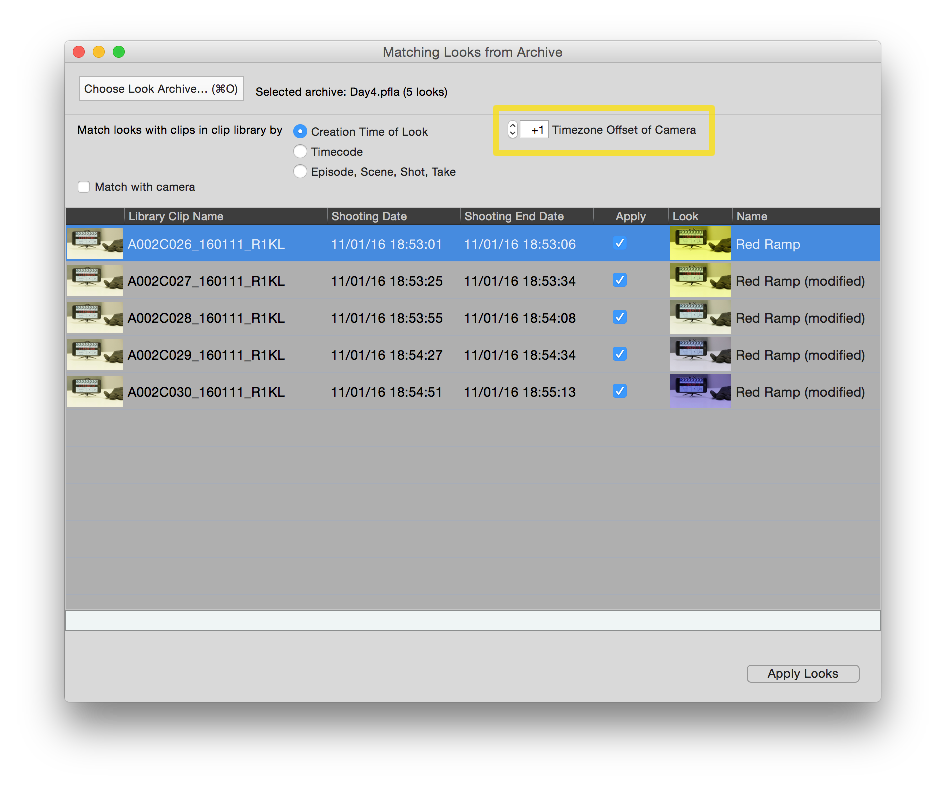
Figure 6: Adapt the timezone offset if needed.
• Match by Episode, Scene, Shot, Take
This criterion will match the looks by the episode, scene, shot and take metadata values. The look will match to a clip if the metadata for episode, scene, shot or take is equal.
Additionally to the three different matching criteria, for each of them you can:
• Match with Camera
Additionally to the selection of your criterion among the three criteria you can choose if the looks should be matched to the clips by the camera metadata value.
Example:
If you have Camera A and B and match looks by timecode the looks may apply to both of the cameras if they have the same TC. If you then enable the checkbox “Match with camera” the camera value will be considered on top of the TC and will then match the correct looks to the camera specific clips.
To learn how to simply transfer looks from LiveGrade to Silverstack please refer to this article Transferring Looks from LiveGrade Pro to Silverstack.
Try the Look Matching Feature: Sample Material
You want to try the matching feature but don’t want to build a whole environment to produce the matching clips and looks? No worries, we went ahead for you.
Click here to download sample material and the Look Archive to test matching by Timecode.
Click here to download sample material and the Look Archive to test matching by Episode, Scene, Shot, Take.
Click here to download the Silverstack 5 beta Library including the prepared bins.
You will be able to import the Silverstack Library from the Main Menu of Silverstack. Choose “File > Import Library Folder” or use the shortcut Command + Shift + O .
You can relink the sample material to the bins in the Library by performing a right click on the bin. Choose “Relink” in the context menu and in the following wizard choose the directory you downloaded the clips to.
If you are also interested in testing the complete process from the start click here to download the LiveGrade 3.4 Library including the looks from the Look Archives.