Silverstack offers a solution to export clips to DaVinci Resolve including ASC-CDL color metadata. Additionally it is possible to set up Resolve with the according LUTs to reflect the color processing done in Silverstack.
How to Transfer Clips from Silverstack to a DaVinci Resolve Timeline
The steps to perform to transfer a bin from Silverstack to a Resolve timeline are in detail:
- Export FCPXML and additional color metadata from Silverstack
- Import FCPXML into DaVinci Resolve
- Use the Colortrace function in Resolve to add ASC-CDL color data
Export FCPXML and additional color metadata from Silverstack
To export to Resolve select the desired bin from the Silverstack Library. Either perform a secondary (right) click on the bin and select “Export to > Davinci Resolve Export” or from the “Export” button in the title bar of Silverstack choose “Davinci Resolve Export”.
You will be presented with a window where you can select or deselect clips from the bin that should be exported:

Figure 1: Choose clips and media files for Davinci Resolve export
After making your selection click “Continue”.
A further dialog window opens up:

Figure 2: Davinci Resolve export options
Here you can choose to either just export the FCPXML to result in a timeline in DaVinci Resolve without color metadata.
Or you can additionally export look that result in an EDL and CCC file and contain the required information to match the looks to the clips via Colortrace in Resolve.
To receive the possibility of having color metadata matched to the clips select both checkboxes and click “Export…”. Select the desired destination for the FCPXML file. The EDL and CC file will be put in the same directory automatically.
Import FCPXML into DaVinci Resolve
Open up DaVinci Resolve and create a new Project.
Before importing the FCPXML we will have to set a preference in Resolve to pull the Reel Name metadata from the FCPXML which will be important for the color matching. In the Project Settings go to “Master Project Settings” and inside of that to “Conform Options”. Make sure to check “Assist using reel names from the:” checkbox and select “Embedding in Source clip file” as an option:
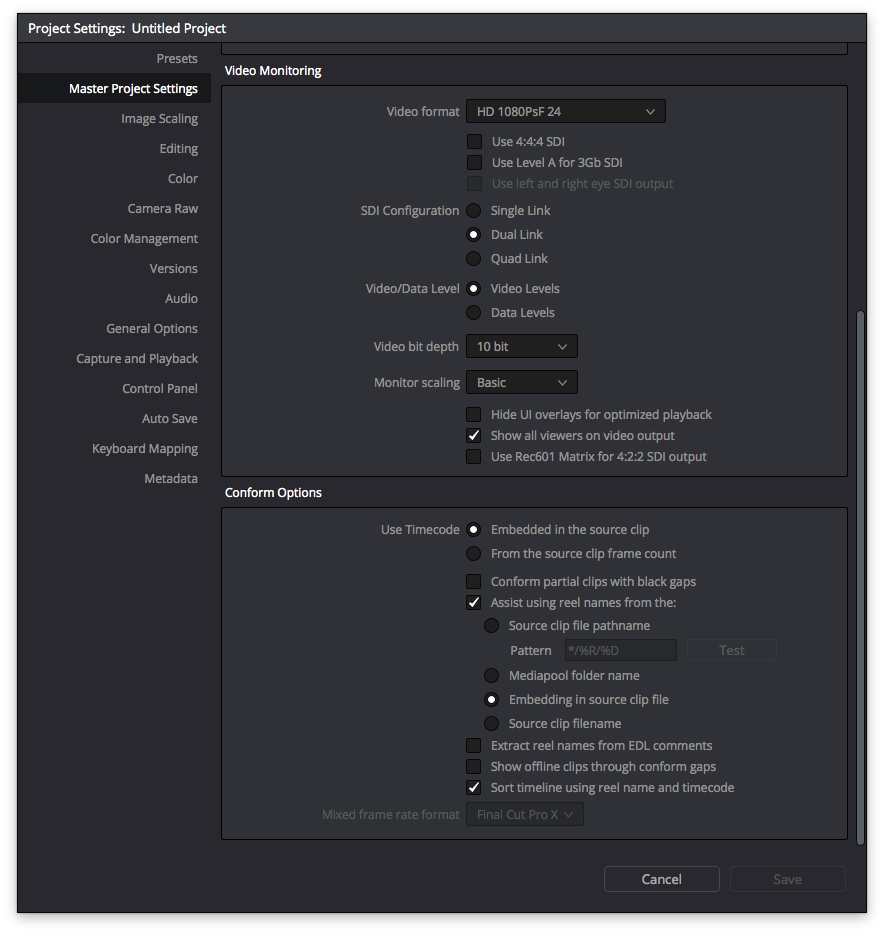
Figure 3: Set the Project Settings Conform Options for the right reel name handling for Color Trace matching
The option you have to choose for a proper match can differ for different material. The option described fits for QT Prores files.
Now you can import the FCPXML.
From the Main Menu choose “File > Import AAF, EDL ,XML”. Navigate to the path where you saved the FCPXML from Silverstack select it and click open.
You will be presented with an option window for loading XMLs:
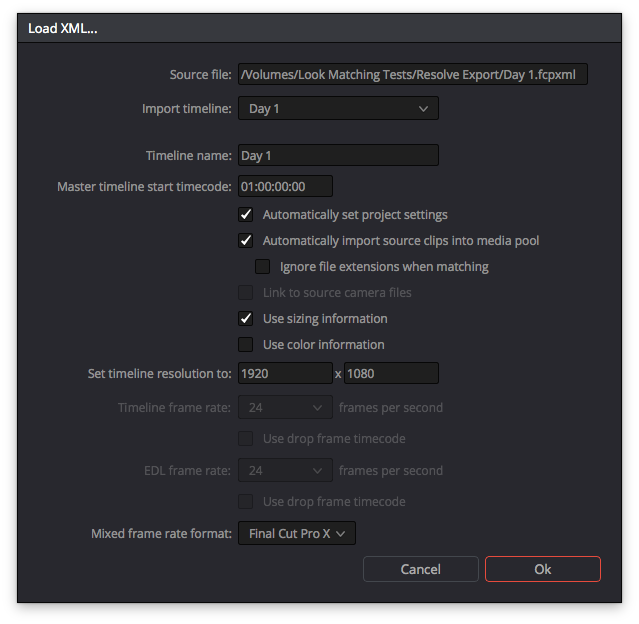
Figure 4: Preferences for loading an XML in DaVince Resolve
Check to have the checkbox “Automatically set project settings” enabled which should be the case by default. That makes sure all settings will be adapted to match the clips from the FCPXML.
Click “Ok”.

Figure 5: The main window of Resolve with the imported timeline
You should be presented with the “Edit” tab in Resolve that shows the Media Pool on the left and a timeline containing all the clips from the Silverstack bin you formerly exported.
How to Add Color Metadata to the Clips in the Timeline
Use the Colortrace Function to add ASC-CDL color metadata.
After creating the timeline you will be able to add the color information.
Select the timeline from the media pool. It should be marked with a little XML indicator on its lefthand side. Perform a secondary (right) click on it and choose “Timelines > ColorTrace > ColorTrace from CDL” from the context menu:
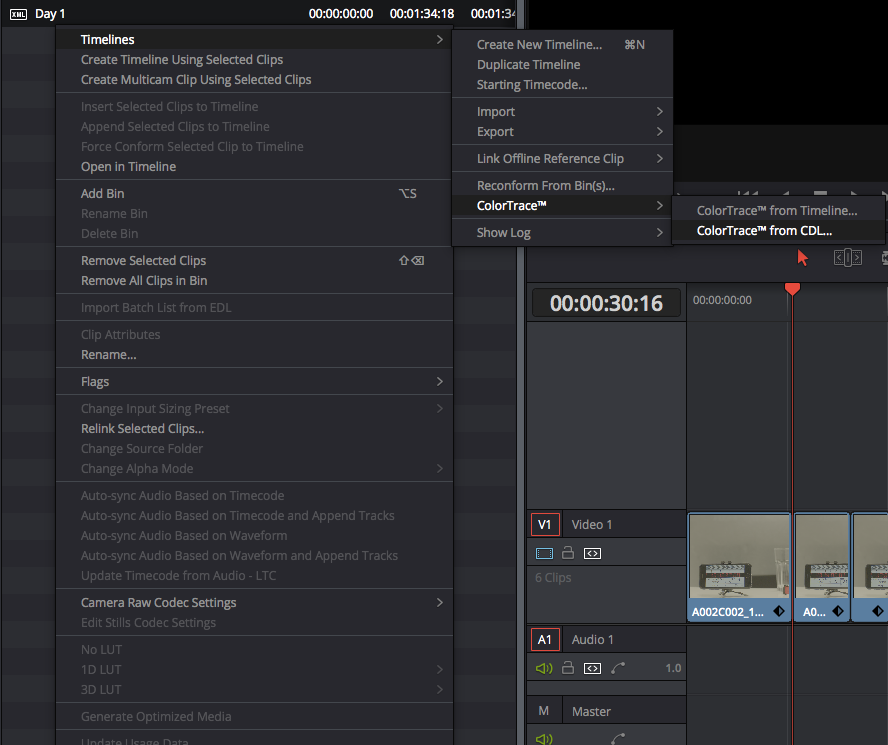
Figure 6: Select ColorTrace from CDL
You will be presented with an open dialog where you will first have to choose the exported EDL file. Right after that you will have to choose the exported CCC file.
After opening both of them you will be presented with the ColorTrace option window:
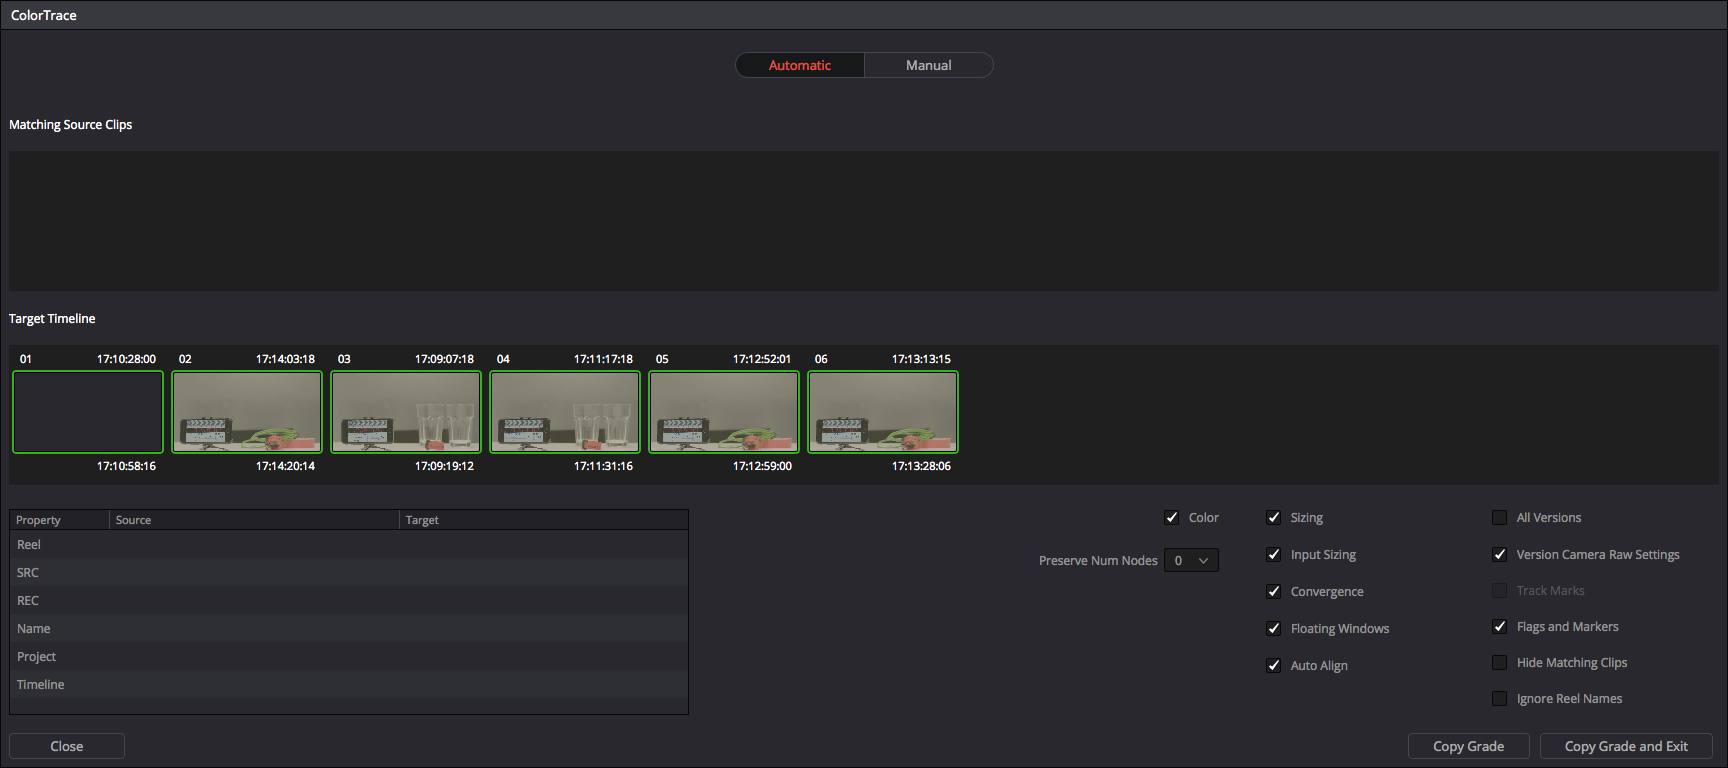
Figure 7: The ColorTrace option window
If all the clips have green borders everything matches fine. Click “Copy Grade and Exit” to copy the according grades to the clips.
Switching to the Color tab presents you with the clips that now have the ASC-CDL color metadata from Silverstack added:
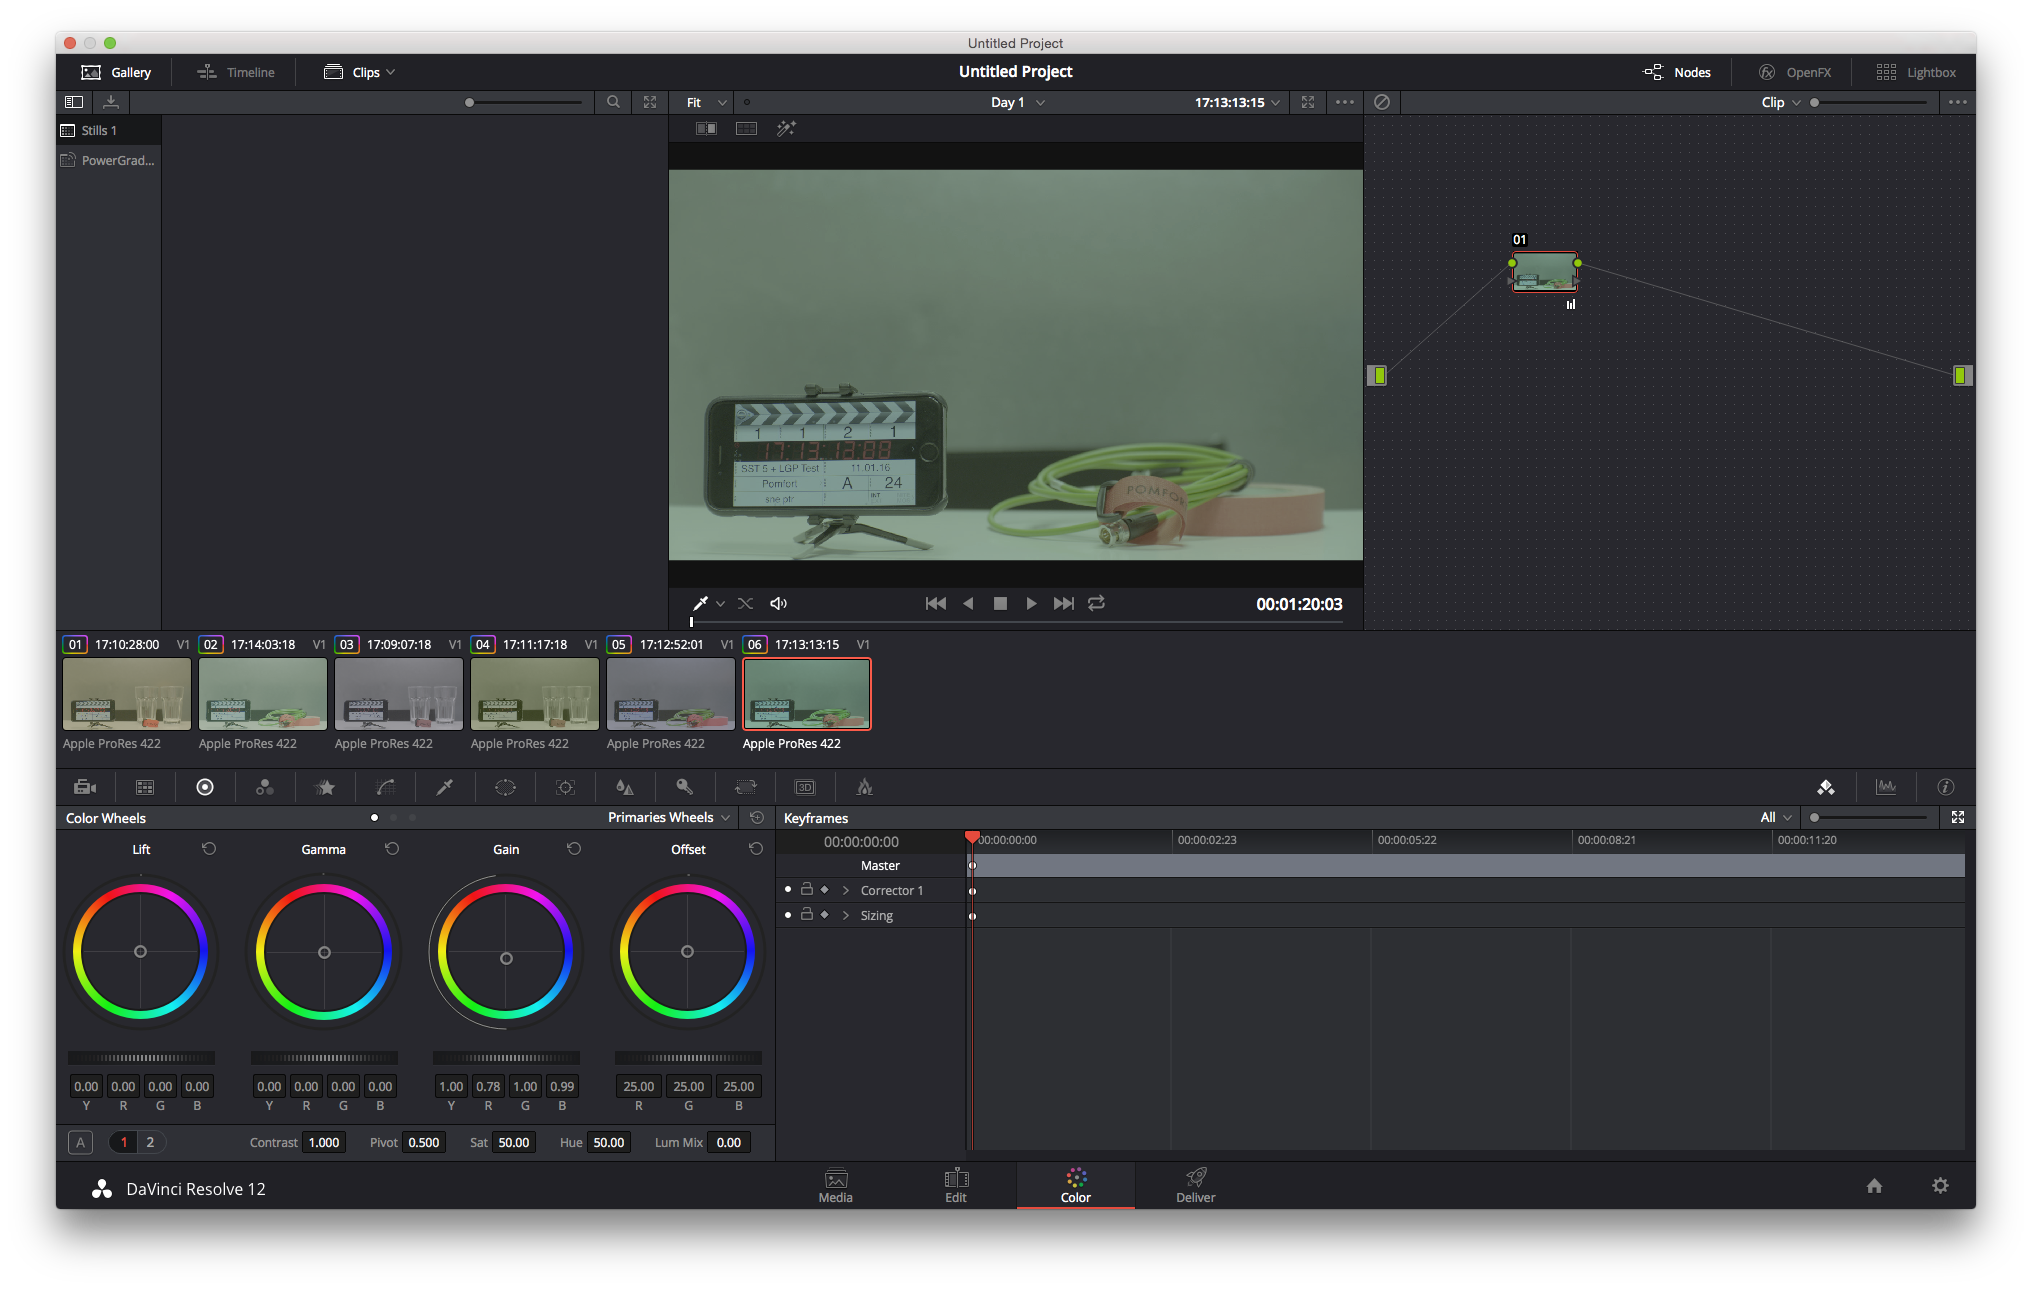
Figure 8: Switch to the color tab to see the clips with added color metadata