Silverstack’s Look Library and grading controls enable you to receive looks from LiveGrade. You can choose to export a single look or multiple looks. A single look will be handled as a Pomfort Look (.pfl) file, while multiple looks will be put together into a Pomfort Look Archive (.pfla) file. To transfer looks from LiveGrade including all grading nodes and their settings perform the following steps.
Exporting a Look from LiveGrade
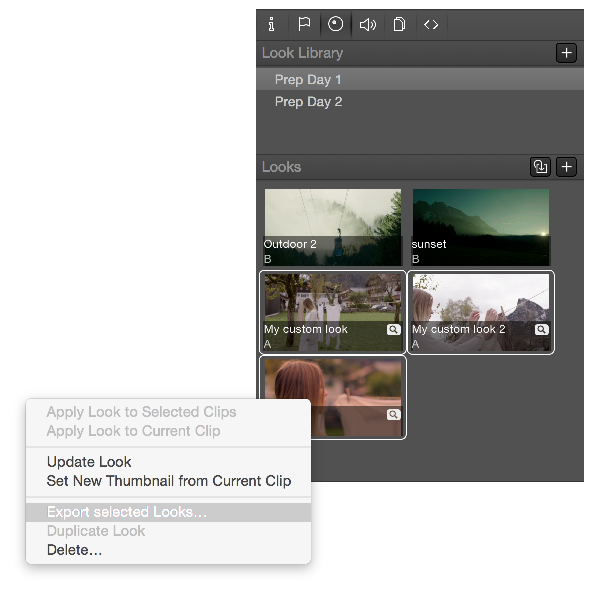
Select the desired look(s) in the library of LiveGrade. In the main menu go to “File>Save selected Looks As…”:

Figure 1: Save selected Looks as
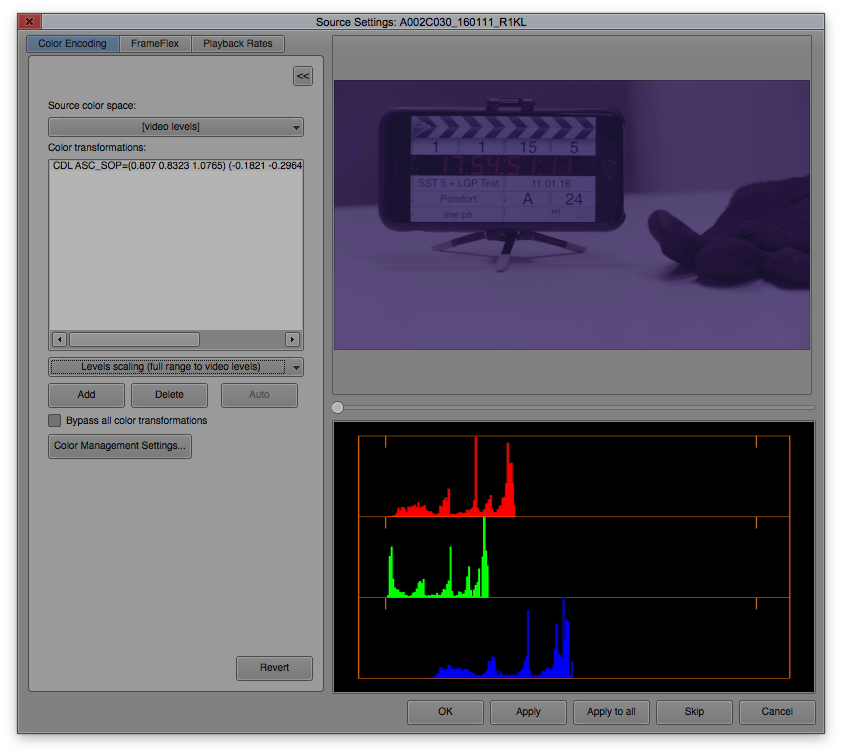
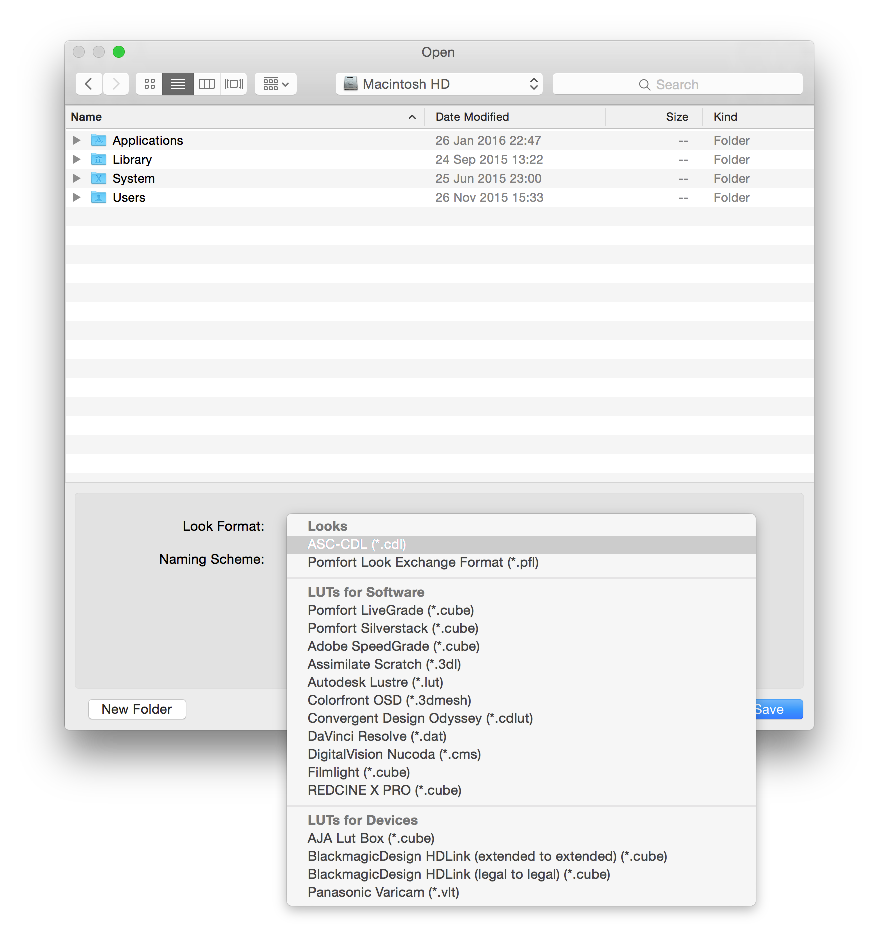
After that a save dialog appears. As “Look Format” select “Pomfort Look (.pfl)” then choose the name and the destination to save to:

Figure 2: Save dialog for “Pomfort Looks”
More information about creating and managing looks in LiveGrade can be found in the articles Grading Modes in LiveGrade and Create Clips, Stills and Looks.
Importing a Look into Silverstack
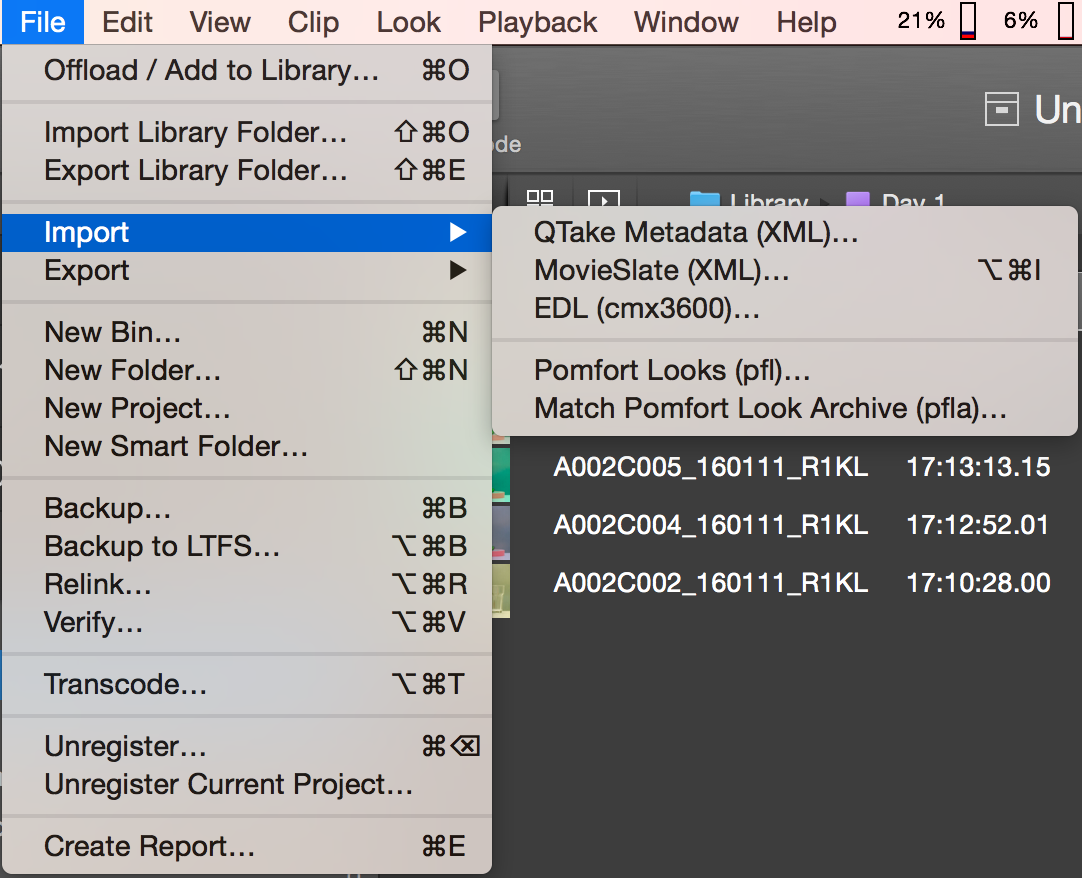
Open Silverstack. Go to the Main Menu and select “File>Import>Pomfort Looks (pfl)…”.
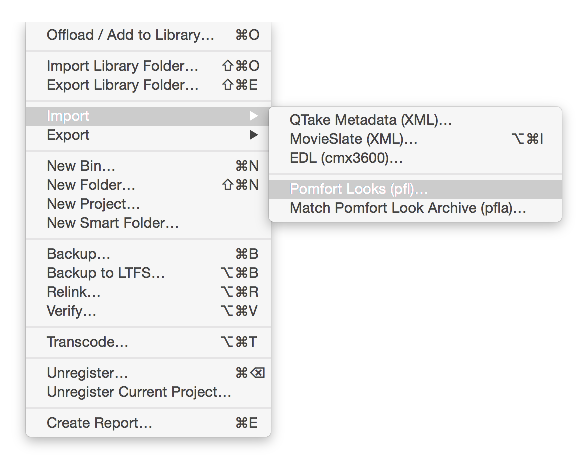
Figure 3: Import the .pfl file into Silverstack.
An open dialog shows up. Navigate to the previously saved .pfl file from LiveGrade:

Figure 4: Open dialog for Pomfort Looks
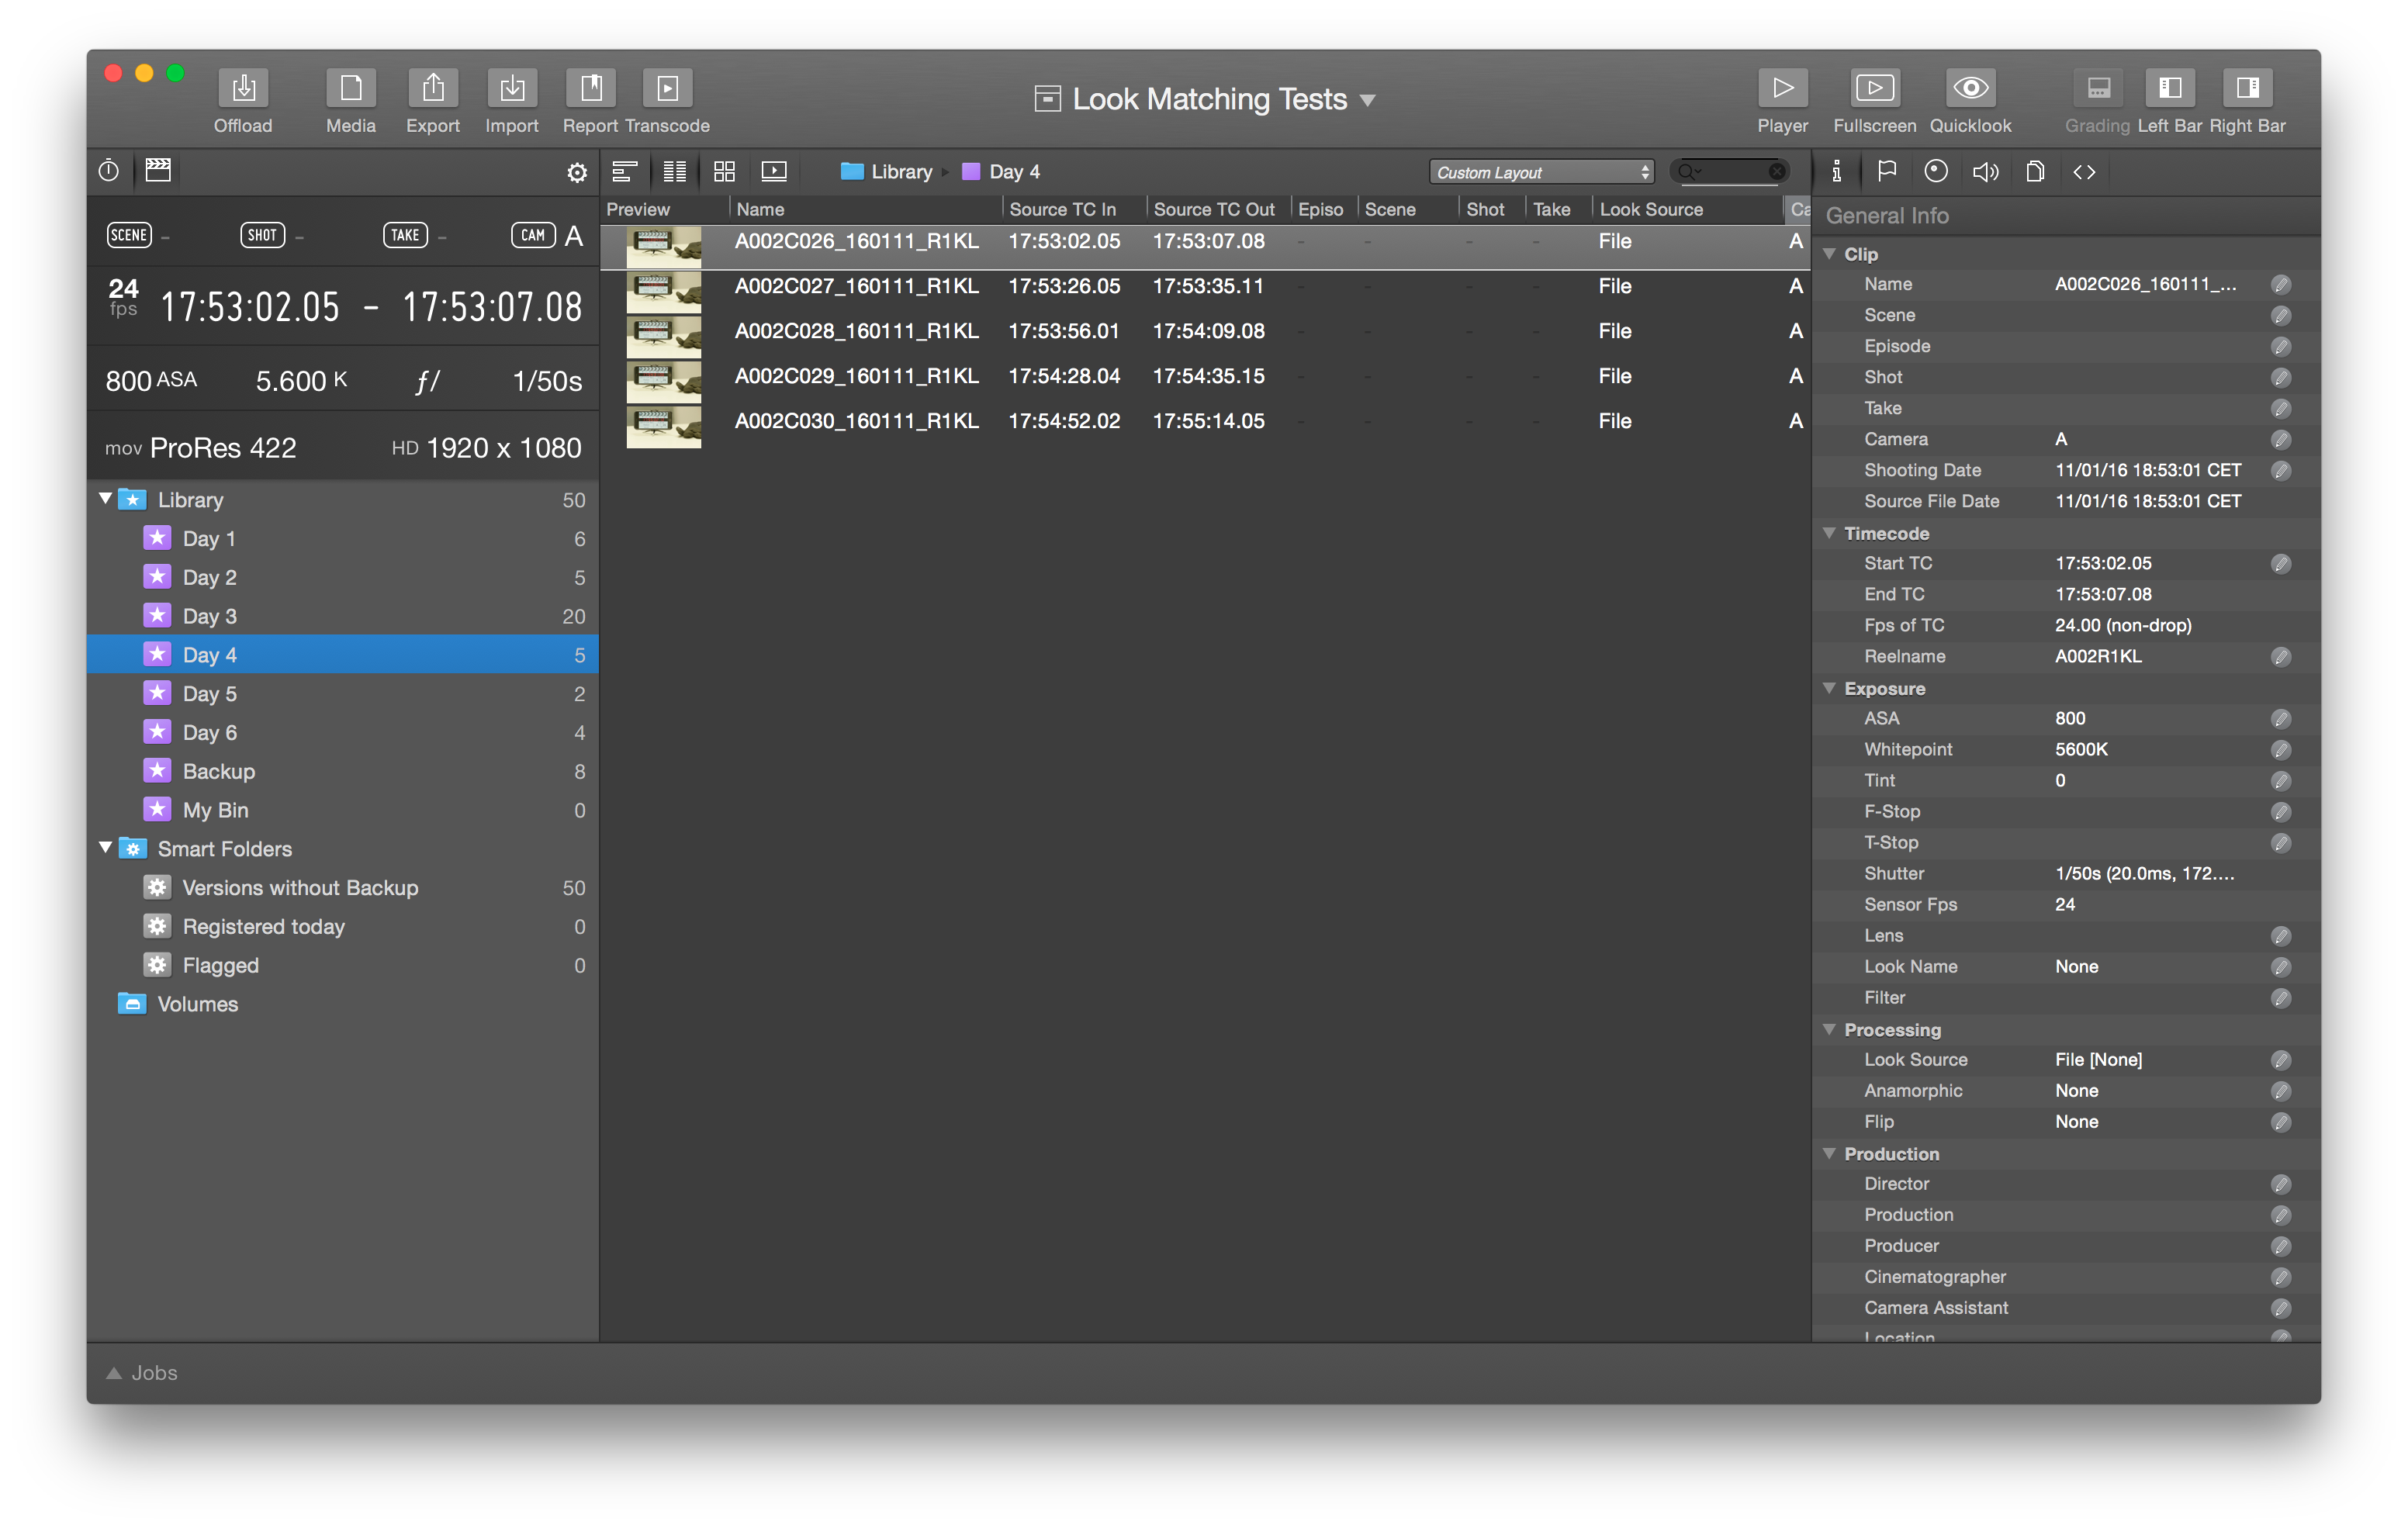
Make sure that Silverstack’s Look Library in the right info bar is shown (for example toggle the right bar from the toolbar). Learn how to use the Look Library in Silverstack from the article The Silverstack Look Library. Go to the Look tab:

Figure 5: The Looks section with the imported “Blueish”
The look from LiveGrade will appear in the “Looks” section containing:
- Thumbnail
- Look name
- Metadata
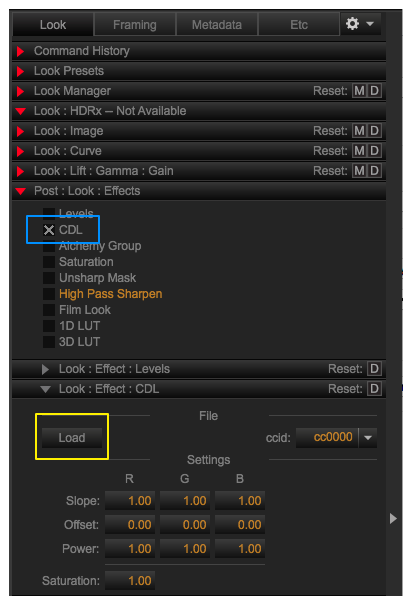
The settings of the grading nodes reflect those of the look in LiveGrade. After applying the look to the desired clip you will be able to modify it in Silverstack from the point where you left off in LiveGrade.
To learn more about the grade controls in Silverstack please refer to the article Grading Controls in Silverstack 5.
Exporting a Look Archive from LiveGrade
A Look Archive can contain one or multiple looks along with all the further metadata acquired in LiveGrade Pro.
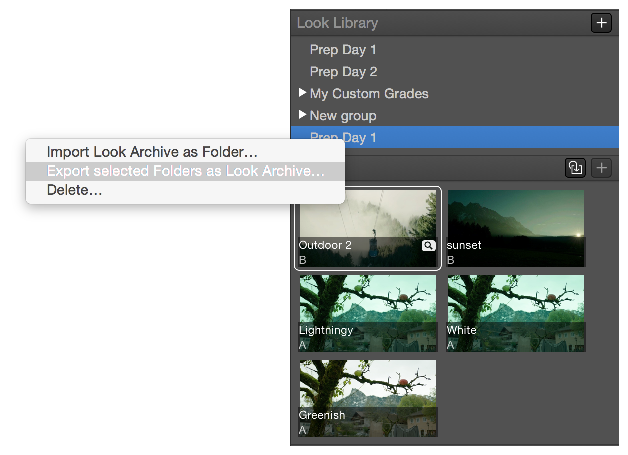
To export a Look Archive put all the desired looks into one folder in the LiveGrade Look Library. Perform a right click on that folder and choose “Export Look Archive” from the context menu:
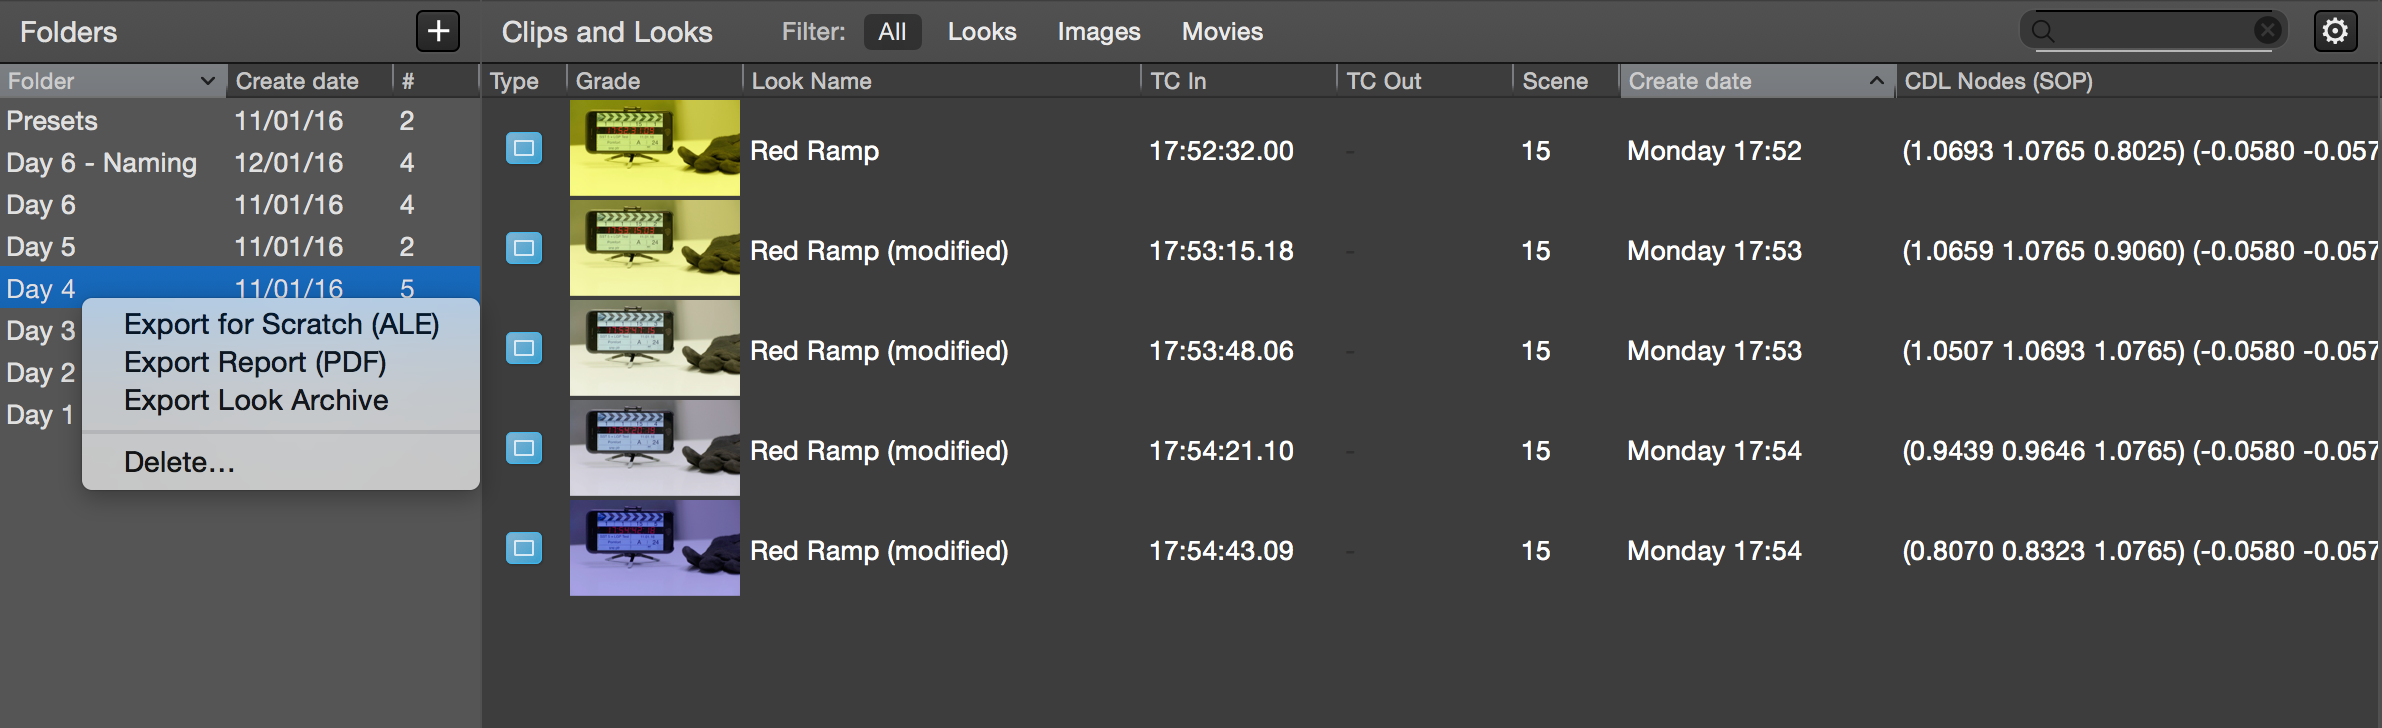
Figure 6: Exporting a Look Archive from LiveGrade Pro
Save the resulting .pfla (Pomfort Look Archive) file to the desired destination.
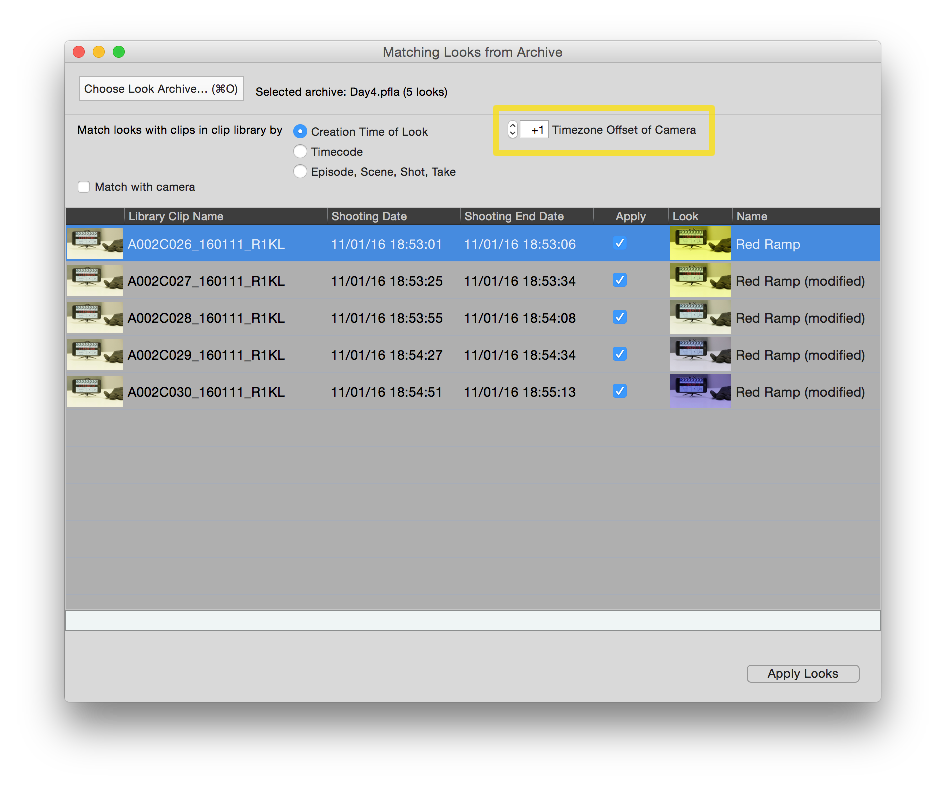
Importing a Look Archive into Silverstack
Go to the looks tab in the Right Bar of Silverstack. In the Look Library perform a secondary click (right click)
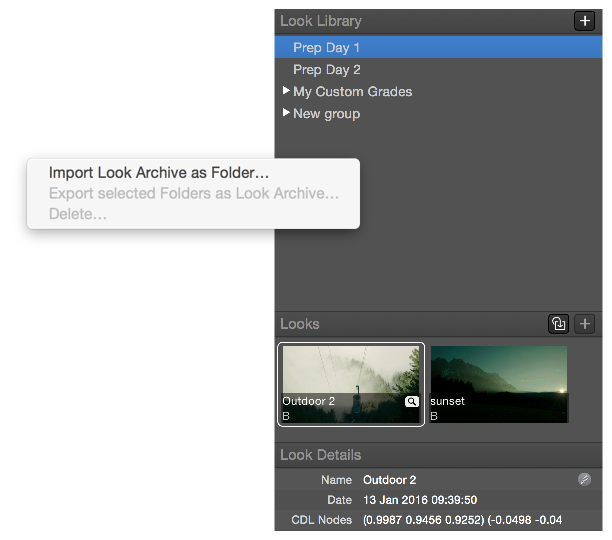
Figure 7: Importing a Look Archive as a folder.
Select the desired .pfla (Pomfort Look Archive) file and click. The Looks from the Archive will then be available in the newly created folders in the Silverstack Look Library.